Save time. Get it fast.
Just define your enrollment period and complete your master schedule in 5 easy steps:
The first step is to configure your courses and teachers. Decide the courses you want to include along with the teachers for each class. You will also configure your course request templates during this step.

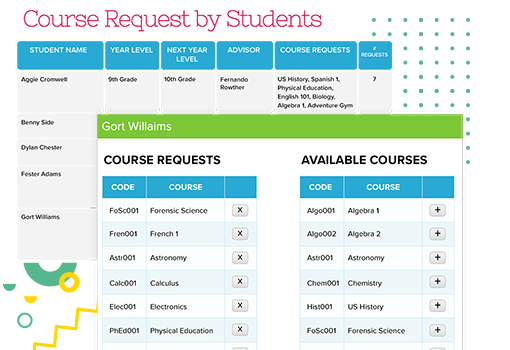
The second step is to manage course requests. We have a few options for managing your course requests: either requests by students, by course, and even bulk course requests. Of course, if a course gets dropped you have the ability to bulk move all the students to an alternate course.
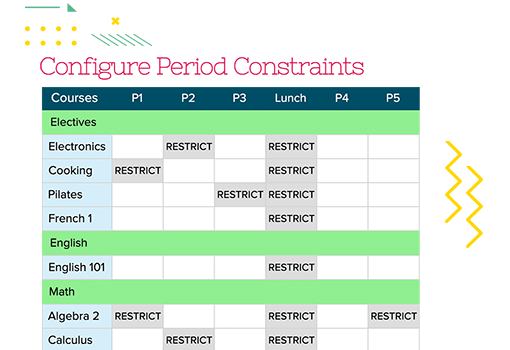
Thirdly, you can now set your constraints. Decide the time slots available, which teacher is available to teach the className or even how many students one section can hold. It all depends on you; it is highly flexible according to how you want them to be.
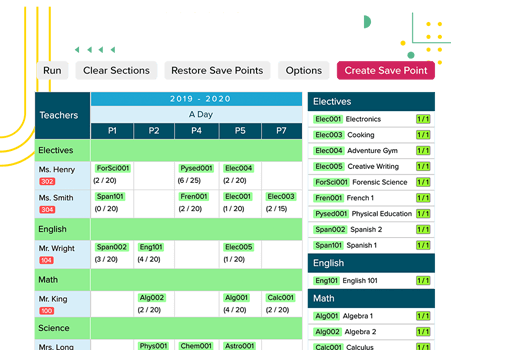
Now you are ready to generate your schedule. No worries about not having the perfect schedule since you can always just edit it at any time! You can even drag and drop your sections after the generator has produced your schedule for you.
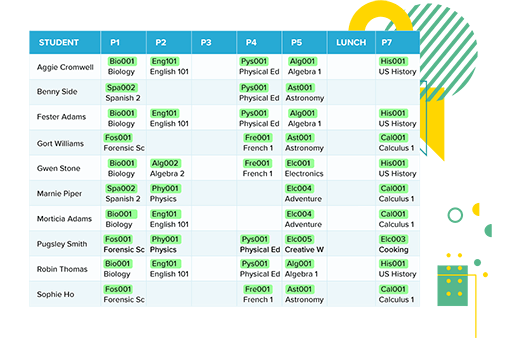
Step 5, easily load students into the schedule. Master Scheduler - Done! Now the only decision is to decide who to share it with.
Scheduling made easy, get started now.
Sign up and test drive our Online Master Scheduler today. If you need more
than just a Master
Scheduler, you can also contact us to design a
custom package for your school.